引论
机场、车站、高速服务区随处可见信息显示屏,有的高悬只做单向显示,有的在地面只可在屏幕上进行操作如导航、查询等,在Andorid之前这块是嵌入式以及Win Embed的领域。现在Android设备的成本以及性能,Andorid App开发技术和开发人员的丰富,用Android驱动信息展示机已是更为合理的趋势。
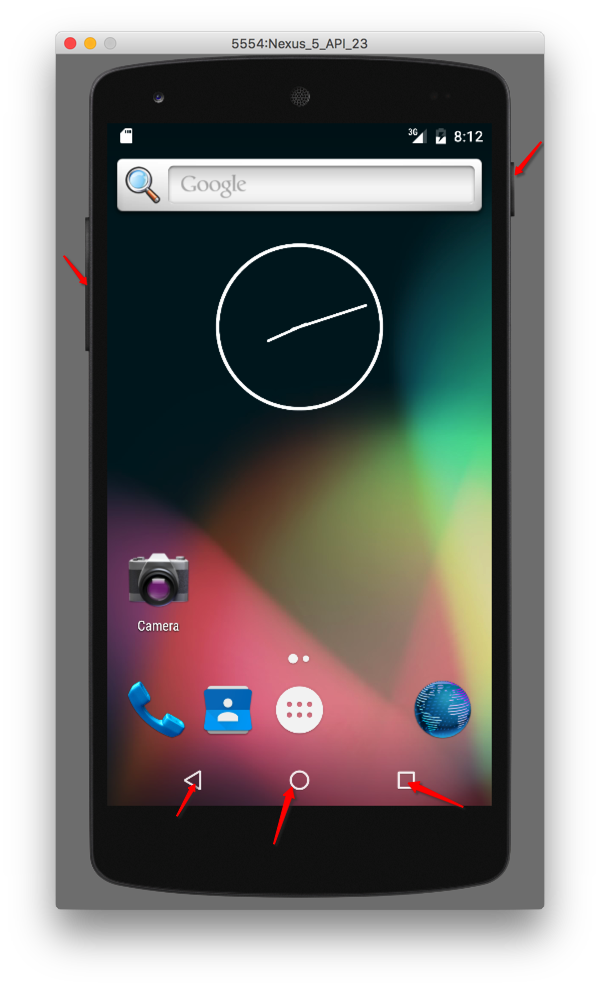
在这类设备上,绝大多数都是使用物理遮盖或硬件定制,将正常的Andorid系统所必需的控制按键进行了处理,使用过程中普通用户接触不到控制键,达到专用(不可退出,只能使用既定功能)的上的。
我们现在就来看看如何把一个正常的Android设备,通过软件Hack的方式,打造成这类的专用设备。
PS:Google官方的Cardboard应用即属此类,交互方式只剩下一个按垫片了。
分析
Andorid系统本身是为移动设备开发的,包括UI和硬件交互设施:
除了屏蔽按键,应用需要系统启动后自动启动。
UI根据需要按照App正常开发方法进行裁剪。
还需要注意的点:
- 健全的退出机制(任何情况下都要有的设计,类似后门)
- 普通用户必须知道如何退出,特别是通过应用商店分发(定制化场景不考虑退出)
- 软件方式只能覆盖一些应用场景,效果也不是最好,软硬结合才是王道。
Happy Hack
##准备
添加MyApplication全局入口
1 2 3 4 5 6 7 8
| <application android:name="com.geekdev.alpha.hack4andriodbuttons.MyApplication" android:allowBackup="true" android:icon="@mipmap/ic_launcher" android:label="@string/app_name" android:supportsRtl="true" android:theme="@style/AppTheme"> </application>
|
添加一个MainActivity
1 2 3 4 5 6 7 8 9
| <activity android:name="com.geekdev.alpha.hack4andriodbuttons.MainActivity" android:label="@string/app_name"> <intent-filter> <action android:name="android.intent.action.MAIN" /> <category android:name="android.intent.category.LAUNCHER" /> </intent-filter> </activity>
|
利用SharedPreference添加一个开关,Preference.java:
1 2 3 4 5 6 7 8 9 10 11 12 13 14
| public class PreferenceUtils { private static final String PREF_NoButtons_MODE = "pref_NoButtons_mode"; public static boolean isNoButtonsModeActive(final Context context) { SharedPreferences sp = PreferenceManager.getDefaultSharedPreferences(context); return sp.getBoolean(PREF_NoButtons_MODE, false); } public static void setNoButtonsModeActive(final boolean active, final Context context) { SharedPreferences sp = PreferenceManager.getDefaultSharedPreferences(context); sp.edit().putBoolean(PREF_NoButtons_MODE, active).commit(); } }
|
自启动
在Android.manifest中添加权限和Receiver:
1
| <uses-permission android:name="android.permission.RECEIVE_BOOT_COMPLETED" />
|
添加启动广播Receiver:
1 2 3 4 5
| <receiver android:name="com.geekdev.alpha.hack4andriodbuttons.BootReceiver"> <intent-filter> <action android:name="android.intent.action.BOOT_COMPLETED" /> </intent-filter> </receiver>
|
BootReceiver.java:
1 2 3 4 5 6 7 8 9
| public class BootReceiver extends BroadcastReceiver { @Override public void onReceive(Context context, Intent intent) { Intent myIntent = new Intent(context, MainActivity.class); myIntent.addFlags(Intent.FLAG_ACTIVITY_NEW_TASK); context.startActivity(myIntent); } }
|
返回键
重写MainActivity中的onBackPressed方法:
1 2 3 4 5
| @Override public void onBackPressed() { Log.i(TAG,"can't back"); }
|
Home键
重头戏,由于Android不允许改变Home键的行为,所以只能做一些Workaround来绕过限制。
起一个Service,作为守护Service,死循环,每隔3s检查应用是否在前台运行,没有运行则唤醒。由于Android设置了Home键放开后延迟5s才执行Service起动Activity的逻辑,小于5s的轮询都可以,为了绕过这个5s限制,ROOT后的系统把应用移动到/system/app且取”android.permission.STOP_APP_SWITCHES”权限。当然如果硬件上把Home键做处理,就自然不会有这个5s延迟了。
在AndroidManifest中声明Service:
1 2 3
| <service android:name="com.geekdev.alpha.hack4andriodbuttons.NoButtonsService" android:exported="false" />
|
在MyApplication应用启动时启动NoButtonsService:
1 2 3 4 5 6 7 8 9 10 11 12 13
| public class MyApplication extends Application { @Override public void onCreate() { super.onCreate(); instance = this; startNoButtonsService(); } private void startNoButtonsService() { startService(new Intent(this, NoButtonsService.class)); } }
|
在NoButtonsService中实现守护逻辑:
1 2 3 4 5 6 7 8 9 10 11 12 13 14 15 16 17 18 19 20 21 22 23 24 25 26 27 28 29 30 31 32 33 34 35 36 37 38 39 40 41 42 43 44 45 46 47 48 49 50 51 52 53 54 55 56 57 58 59 60 61 62 63 64 65 66 67 68 69 70 71 72 73 74 75 76 77
| public class NoButtonsService extends Service { private static final long INTERVAL = TimeUnit.SECONDS.toMillis(3); private static final String TAG = NoButtonsService.class.getSimpleName(); private Thread t = null; private Context ctx = null; private boolean running = false; @Override public void onDestroy() { Log.i(TAG, "Stopping service 'NoButtonsService'"); running =false; super.onDestroy(); } @Override public int onStartCommand(Intent intent, int flags, int startId) { Log.i(TAG, "Starting service 'NoButtonsService'"); running = true; ctx = this; t = new Thread(new Runnable() { @Override public void run() { do { handleNoButtonsMode(); try { Thread.sleep(INTERVAL); } catch (InterruptedException e) { Log.i(TAG, "Thread interrupted: 'NoButtonsService'"); } }while(running); stopSelf(); } }); t.start(); return Service.START_NOT_STICKY; } private void handleNoButtonsMode() { if(PreferenceUtils.isNoButtonsModeActive(ctx)) { if(isInBackground()) { restoreApp(); } } } private boolean isInBackground() { ActivityManager am = (ActivityManager) ctx.getSystemService(Context.ACTIVITY_SERVICE); List<ActivityManager.RunningTaskInfo> taskInfo = am.getRunningTasks(1); ComponentName componentInfo = taskInfo.get(0).topActivity; return (!ctx.getApplicationContext().getPackageName().equals(componentInfo.getPackageName())); } private void restoreApp() { Intent i = new Intent(ctx, MainActivity.class); i.addFlags(Intent.FLAG_ACTIVITY_NEW_TASK); ctx.startActivity(i); } @Override public IBinder onBind(Intent intent) { return null; } }
|
应用切换键
在MainActivity中重写onPause方法,直接用ActivityManager把MainActivity放在最前:
1 2 3 4 5 6 7 8 9
| @Override protected void onPause() { super.onPause(); ActivityManager activityManager = (ActivityManager) getApplicationContext() .getSystemService(Context.ACTIVITY_SERVICE); activityManager.moveTaskToFront(getTaskId(), 0); }
|
别忘了添加权限:
1
| <uses-permission android:name="android.permission.REORDER_TASKS" />
|
音量键
在MainActivity中定义音量键并重写dispatchKeyEvent:
1 2 3 4 5 6 7 8 9 10 11
| private final List blockedKeys = new ArrayList(Arrays.asList(KeyEvent.KEYCODE_VOLUME_DOWN, KeyEvent.KEYCODE_VOLUME_UP)); @Override public boolean dispatchKeyEvent(KeyEvent event) { if (blockedKeys.contains(event.getKeyCode())) { return true; } else { return super.dispatchKeyEvent(event); } }
|
电源键
短按
短按是为了关闭屏幕,监听OnScreenOff的系统广播,在应用启动时注册。
OnScreenOffRecever:
1 2 3 4 5 6 7 8 9 10 11 12 13 14 15 16 17 18 19 20 21 22 23 24 25 26 27 28
| public class OnScreenOffReceiver extends BroadcastReceiver { @Override public void onReceive(Context context, Intent intent) { if(Intent.ACTION_SCREEN_OFF.equals(intent.getAction())){ MyApplication ctx = (MyApplication) context.getApplicationContext(); if(PreferenceUtils.isNoButtonsModeActive(ctx)) { wakeUpDevice(ctx); } } } private void wakeUpDevice(MyApplication context) { PowerManager.WakeLock wakeLock = context.getWakeLock(); if (wakeLock.isHeld()) { wakeLock.release(); } wakeLock.acquire(); wakeLock.release(); } }
|
应用启动时注册:
1 2 3 4 5 6 7 8 9 10 11 12 13 14 15 16 17 18 19 20 21 22 23 24 25 26 27 28 29 30 31 32 33 34 35 36
| public class MyApplication extends Application { private MyApplication instance; private PowerManager.WakeLock wakeLock; private OnScreenOffReceiver onScreenOffReceiver; @Override public void onCreate() { super.onCreate(); instance = this; registerNoButtonsModeScreenOffReceiver(); startNoButtonsService(); } private void registerNoButtonsModeScreenOffReceiver() { final IntentFilter filter = new IntentFilter(Intent.ACTION_SCREEN_OFF); onScreenOffReceiver = new OnScreenOffReceiver(); registerReceiver(onScreenOffReceiver, filter); } public PowerManager.WakeLock getWakeLock() { if(wakeLock == null) { PowerManager pm = (PowerManager) getSystemService(Context.POWER_SERVICE); wakeLock = pm.newWakeLock(PowerManager.ACQUIRE_CAUSES_WAKEUP, "wakeup"); } return wakeLock; } private void startNoButtonsService() { startService(new Intent(this, NoButtonsService.class)); } }
|
别忘了添加WAKE_LOCK权限:
1
| <uses-permission android:name="android.permission.WAKE_LOCK" />
|
长按
长按是为了关机,直接把系统的关机弹出对话框处理掉,这里只要系统对话框都关掉。
在MainActivity中重写onWindowFocusChanged焦点变化时:
1 2 3 4 5 6 7 8 9 10
| @Override public void onWindowFocusChanged(boolean hasFocus) { super.onWindowFocusChanged(hasFocus); if(!hasFocus) { Intent closeDialog = new Intent(Intent.ACTION_CLOSE_SYSTEM_DIALOGS); sendBroadcast(closeDialog); } }
|
防止屏幕自动关闭屏幕
在Layout文件中添加为根视图添加属性:
1
| android:keepScreenOn="true"
|
在MainActivity的onCreate方法中添加,要放在setContentView之前:
1 2
| getWindow().addFlags(WindowManager.LayoutParams.FLAG_KEEP_SCREEN_ON); getWindow().addFlags(WindowManager.LayoutParams.FLAG_DISMISS_KEYGUARD);
|
开关
开启
放在MainActivity的onResume而不是onCreate,避免开关关闭后,离开应用而应用没有被系统回收,再次打开应用时onCreate没有开启开关。
1 2 3 4 5
| @Override protected void onResume() { super.onResume(); PreferenceUtils.setNoButtonsModeActive(true, getApplicationContext()); }
|
关闭
设置一个Button监听事件:
1 2 3 4 5 6 7 8 9 10
| Button fab = (Button) findViewById(R.id.hiddenExitButton); fab.setOnClickListener(new View.OnClickListener() { @Override public void onClick(View view) { PreferenceUtils.setNoButtonsModeActive(false, getApplicationContext()); Snackbar.make(view, "可以退出了", Snackbar.LENGTH_SHORT) .setAction("Action", null).show(); } });
|
结论
我们通过以上Hack步骤,将一个Android设备变成了专用机,可以看到Android以其独特的开放特性可以覆盖足够多的使用场景,也符合Google提出的Android is everywhere的口号。
项目地址:github
Reference
http://developer.android.com/intl/zh-cn/reference/android/view/WindowManager.LayoutParams.html#FLAG_DISMISS_KEYGUARD
http://developer.android.com/intl/zh-cn/training/scheduling/wakelock.html